Working with graphical applications with the NX client application
Introduction
The NX server/client suite enables you to very efficiently work over the network with graphical applications. For our cluster, it will open a full KDE desktop in a window on your machine. You can copy and paste across windows, and you'll see that it almost feels as working locally. Also, sessions can survive disconnections and crashes, and you can reconnect to the same session with all the windows intact.Installation of nxclient on your client machine
- The nxclient software is available for free from http://www.nomachine.com/
 . Go to the download page and pick the package that best matches your local machine.
- Install the package (usually requiring you to be root on your machine). Example for the installation on a SL5 system
rpm -ivh nxclient-3.3.0-6.x86_64.rpm
- Launch the nxclient application (as your user! not as root). The
-wizardargument causes nxclient to bring up a dialog where new sessions can be definednxclient -wizard
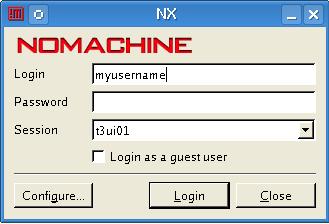
- At the GUI that is presented to you, define the profile for a session.
* nx-docu0.png:

- In the following dialog you are asked to enter the connection parameters. In the desktop section you can either define whether you want to get a full desktop (currently only KDE) or just a specific application. It is best to just start a remote graphical KDE konsole on the server (multiple full KDE desktop sessions to multiple machines can come in conflict, since for our UIs all will use the same identical shared home directory). Choose Custom and use the Settings button to specify nx to start up
/usr/bin/konsoleon connection.

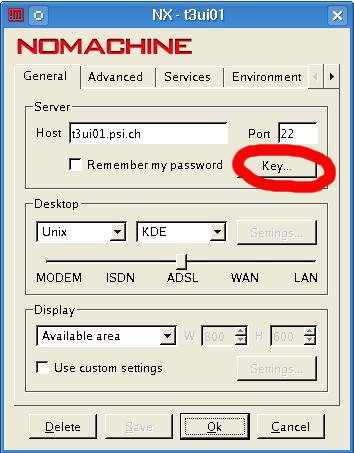
- The next dialog will present to you to you the standard nx client login screen. Before you log in, you still must do some more configuration, so use the configure button.


- Now you need to use the Key... button in the configuration window (see above), and add our service's private key to the profile. To get the key, you need to open a normal ssh terminal session to any of our UIs, and get the contents of the key file
cat /swshare/psit3/etc/NX/client-dsa-key
Paste the contents including theBEGINandEND PRIVATE KEYlines into the dialog box. Note: This key must NOT be given to anyone! It enables you to connect to the service (you still will need to authenticate with your normal passwd, but the basic connection to the service is allowed based on this key). - Do not forget to save your profile (the configurator should prompt you for it)
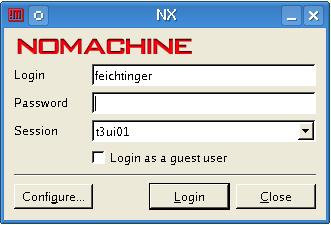
- When you now try to connect to the service with nxclient, you will get a normal password dialog window. Put in your normal Tier-3 passwordI, and hit the
loginbutton. - Enjoy...
Installation of NoMachine Player v4 on Mac OS X
27-02-2013 FOR SOME REASON THAT I COULD NOT DETECT t3ui0[2,3,4] DON'T WORK, PLEASE DON'T USE THEM. On Intel 64-bit Mac OS X 10.5/10.6/10.7/10.8/10.9 you have to install:- NoMachine Player and because you're going to use this Player to run the remote Linux graphical sessions you also need
- XQuartz. Both these installations are straighforward for the average Mac OS X user so are not documented here.
- to scroll down the options
- then select
Create a new custom session - then
Run the following commandand there writekonsole; this is a workaround that we've found because in the default KDE sessions case the string/usr/bin/konsoleis transfered as the wrong string"%2Fusr%2Fbin%2Fkonsole"; that's because of a nomachine protocol mismatch ( client v. 4 while server v. 3 )
Troubleshooting
Handling keyboard mapping problems
Depending on the keyboard that you use on your local machine you may experience key mapping problems (e.g. cursor keys and ALT key not correctly mapped). This can be fixed by reading out the mappings on your local Linux X session and loading them into the server machine.- Generate a file with the keycode mappings
mymachine # xmodmap -pke > my-kmap
- Transfer it to the nx server
mymachine # scp my-kmap feichtinger@t3ui04:
- Load the mappings into the nx server session
t3ui04 # xmodmap my-kmap
xmodmap: my-kmap:193: bad keysym name 'XF86TouchpadToggle' in keysym listJust remove the lines which cause problems from this file and try again to load the keymap. This solution was taken from Daniel Lange's blog


| I | Attachment | History | Action |
Size | Date | Who | Comment |
|---|---|---|---|---|---|---|---|
| |
nx-docu0.png | r1 | manage | 25.8 K | 2010-11-29 - 15:21 | DerekFeichtinger | |
| |
nx-docu01.png | r1 | manage | 32.4 K | 2010-11-29 - 15:22 | DerekFeichtinger | |
| |
nx-docu02.png | r1 | manage | 16.8 K | 2010-11-29 - 15:28 | DerekFeichtinger | |
| |
nx-docu04.png | r1 | manage | 26.3 K | 2010-11-29 - 15:39 | DerekFeichtinger | |
| |
nx-docu1.jpg | r3 r2 r1 | manage | 13.3 K | 2010-11-29 - 15:10 | DerekFeichtinger | |
| |
nx-docu2.jpg | r3 r2 r1 | manage | 65.7 K | 2010-11-29 - 14:58 | DerekFeichtinger |
Topic revision: r14 - 2014-02-06 - FabioMartinelli

Ideas, requests, problems regarding TWiki? Send feedback